How to Auto-Generate Certificates: 3 Methods Compared (2026)
The 3 ways to auto-generate certificates
Auto-generating certificates means one of three things — a DIY script, a manual-but-repeatable mail merge, or a purpose-built tool. Pick based on volume, whether you need a verification URL, and how often you're running the event.
| Method | Best for | Cost | Setup time | Verification URL |
|---|---|---|---|---|
| A — Google Forms + Apps Script | DIY, low volume (<30/month), tech-comfortable | Free | 1–3 hrs | ❌ |
| B — Excel / CSV mail merge | One-off events, full manual control | Free | 30 min | ❌ |
| C — Purpose-built tool (CertFusion) | Recurring events, scale, compliance | Paid | 5 min | ✅ |
The rest of this page walks through each method honestly — including a working Apps Script you can copy — so you can pick what actually fits your situation.
Method A — Google Forms + Apps Script
If you run one webinar a quarter with 20 attendees and you're comfortable in a script editor, this is free and works forever. The tradeoff: ~1–3 hours of setup, no verification URL, and the moment a participant loses the PDF, they have to email you for a resend.
Setup overview:
- Build your certificate in Google Slides with placeholders like
{{name}},{{course}},{{date}}. - Create a Google Form that collects the attendee's name and email.
- In the form's linked sheet, open Extensions → Apps Script and paste the script below.
- Fill in
TEMPLATE_ID(the Slides file ID from its URL) andFOLDER_ID(a Drive folder for the generated PDFs). - Set a trigger: Triggers → Add Trigger → onFormSubmit → From form → On form submit.
Working Apps Script (copy-paste ready):
// Google Apps Script — auto-issue certificate on Google Form submission
// 1. Create a Google Slides template with {{name}}, {{course}}, {{date}} placeholders
// 2. Paste this in Apps Script, fill in TEMPLATE_ID + FOLDER_ID
// 3. Add a trigger: On form submit → onFormSubmit

const TEMPLATE_ID = 'YOUR_SLIDES_TEMPLATE_ID';   // from the Slides URL
const FOLDER_ID   = 'YOUR_OUTPUT_FOLDER_ID';     // Drive folder for generated PDFs
const COURSE_NAME = 'Your Webinar Title';

function onFormSubmit(e) {
  const responses = e.namedValues;
  const name  = (responses['Full Name'] || [''])[0];
  const email = (responses['Email']     || [''])[0];
  if (!name || !email) return;

  const template = DriveApp.getFileById(TEMPLATE_ID);
  const folder   = DriveApp.getFolderById(FOLDER_ID);
  const copy     = template.makeCopy(`Certificate — ${name}`, folder);
  const slides   = SlidesApp.openById(copy.getId());

  slides.getSlides().forEach(slide => {
    slide.replaceAllText('{{name}}',   name);
    slide.replaceAllText('{{course}}', COURSE_NAME);
    slide.replaceAllText('{{date}}',   Utilities.formatDate(new Date(), Session.getScriptTimeZone(), 'MMMM d, yyyy'));
  });
  slides.saveAndClose();

  const pdfBlob = copy.getAs('application/pdf').setName(`${name}-certificate.pdf`);

  MailApp.sendEmail({
    to: email,
    subject: `Your ${COURSE_NAME} certificate`,
    body:    `Hi ${name},\n\nAttached is your certificate. Thanks for joining.\n\n— The team`,
    attachments: [pdfBlob],
  });
}
This works — we've tested the pattern. But you own the script forever: if Google changes a Drive API, if a participant's email bounces, if an attendee wants their certificate re-issued with a corrected name, you're debugging. For the full walkthrough including template-building tips and common errors, see auto-generate from Google Forms (deep dive).
Method B — Excel / CSV mail merge
Word's mail-merge feature is still the most underrated certificate workflow for one-off events. You get full manual control, no integrations, no learning curve — and for a 50-person internal training where you don't need verification URLs, it's genuinely the right choice.
When it wins:
- One-off events (company offsite, single-session training)
- You want to tweak each certificate manually before sending (e.g. personal notes)
- Zero tolerance for external tools (compliance-sensitive orgs)
- Fewer than ~50 recipients
When it breaks:
- 100+ recipients — the manual send step becomes a full afternoon
- You need a verification URL (auditors, hiring managers — this is zero)
- Late registrants — every add means re-running the merge
- Multi-session events where attendance data changes mid-event
- Any compliance requirement (CPD, CME, CEU) where an audit trail is expected
For the step-by-step Word-merge + email workflow, see generate from Excel or generate from Google Sheets.
Method C — Auto-generate from Zoom, Meet, or Webex (CertFusion)
For anything recurring — weekly webinars, monthly training cohorts, quarterly workshops — the tool-backed method wins on time, verification, and audit-readiness. The setup is 5 minutes, once. Every session after that auto-issues.
Step 1: Create a certificate template
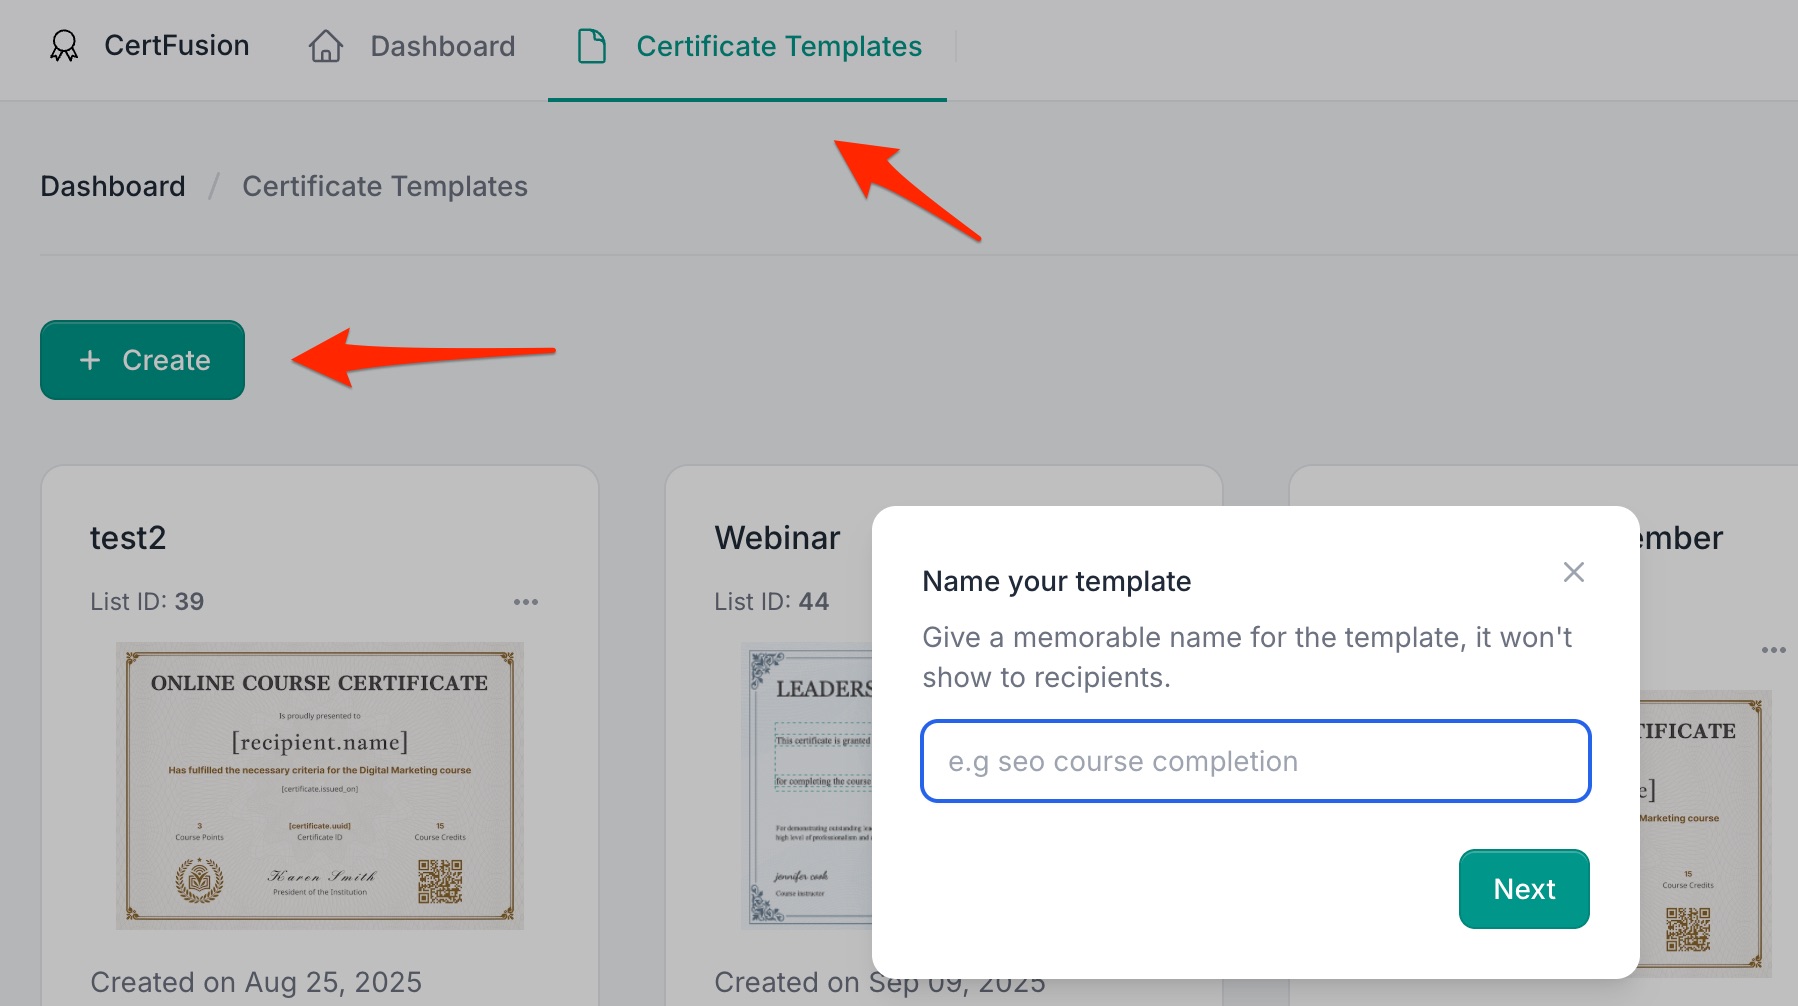
In your CertFusion dashboard, go to Certificate Templates → Create.
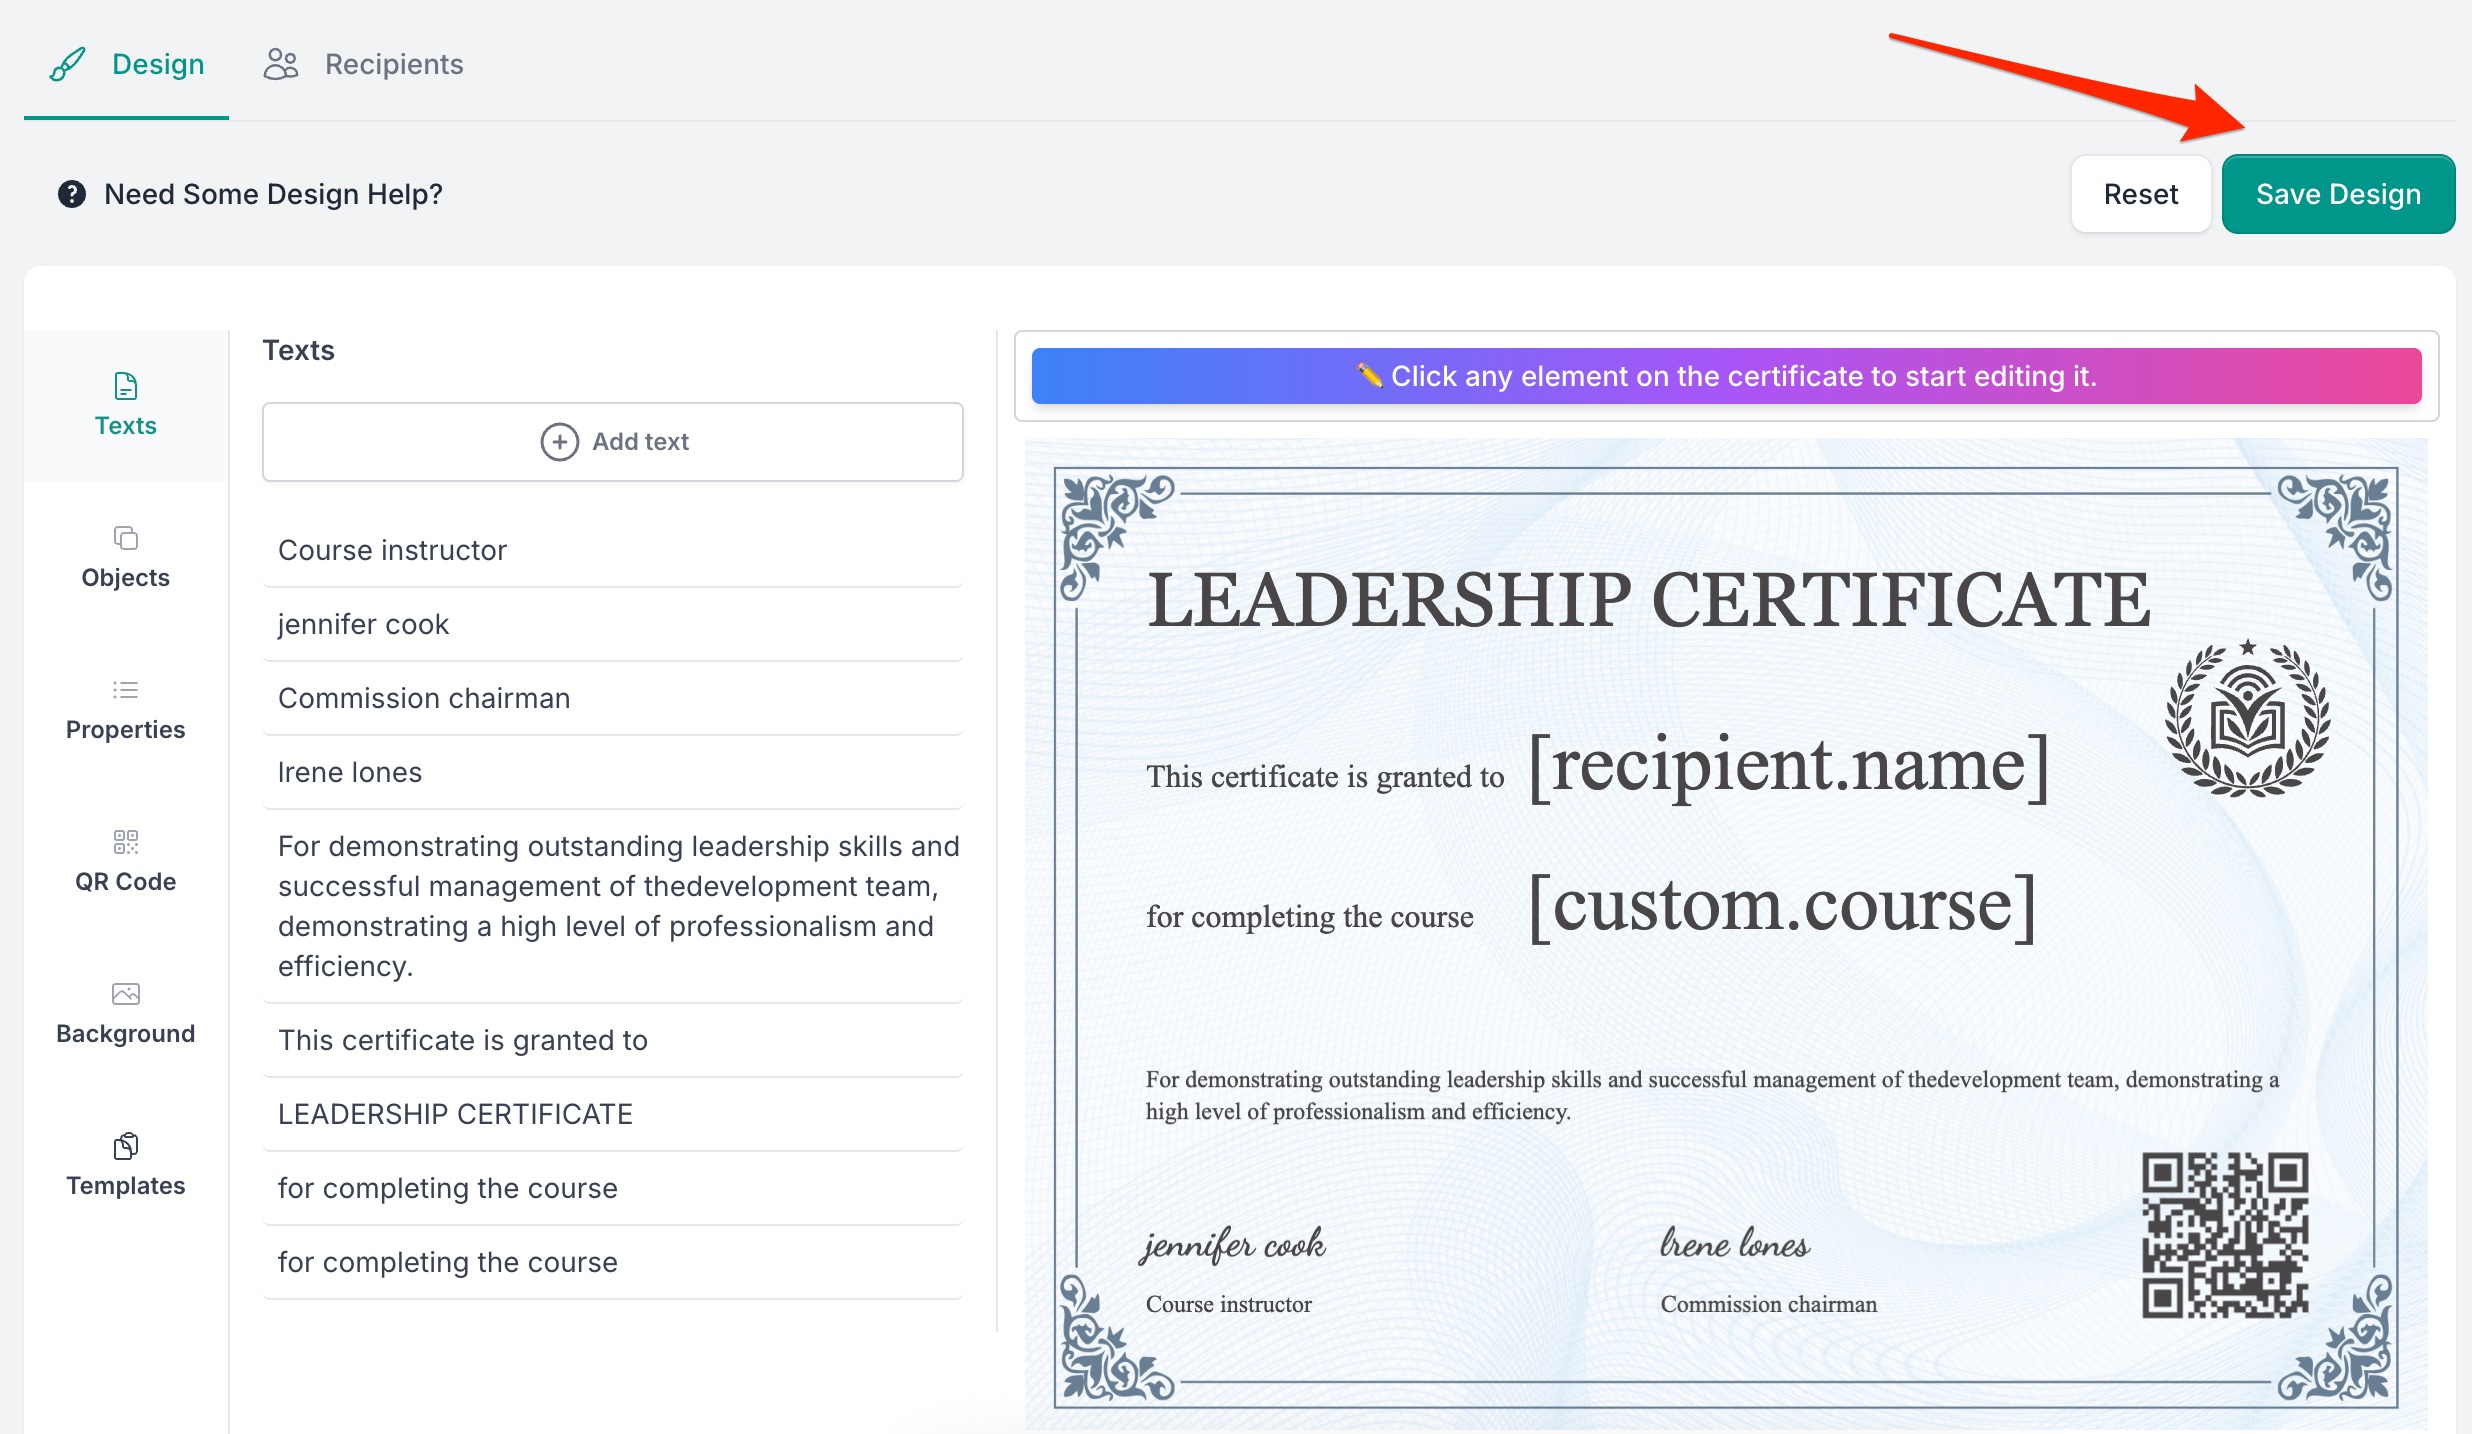
Use the drag-and-drop editor to design the certificate. Add your branding (logo, colours, signatures) and insert dynamic fields:
- Recipient Name — auto-filled per participant
- Unique Certificate ID — auto-generated for verification
- Custom Fields — Course Name, Hours, Instructor, anything you need
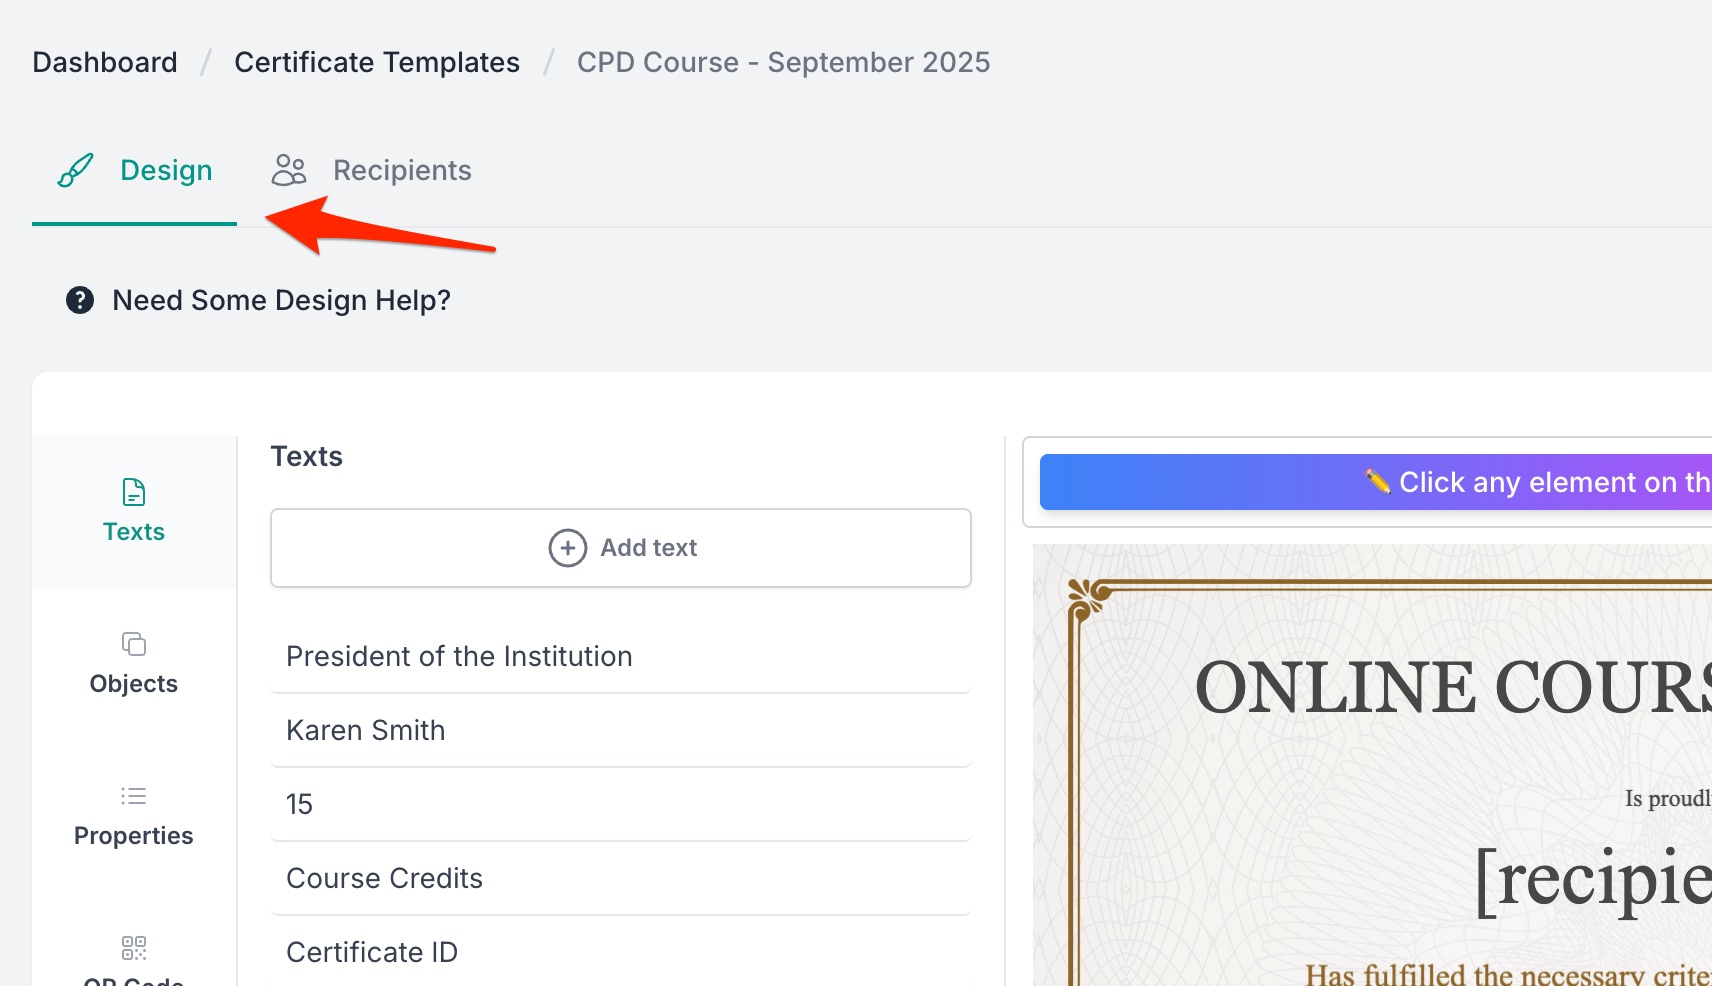
Save the template when done.
Step 2: Connect attendee data
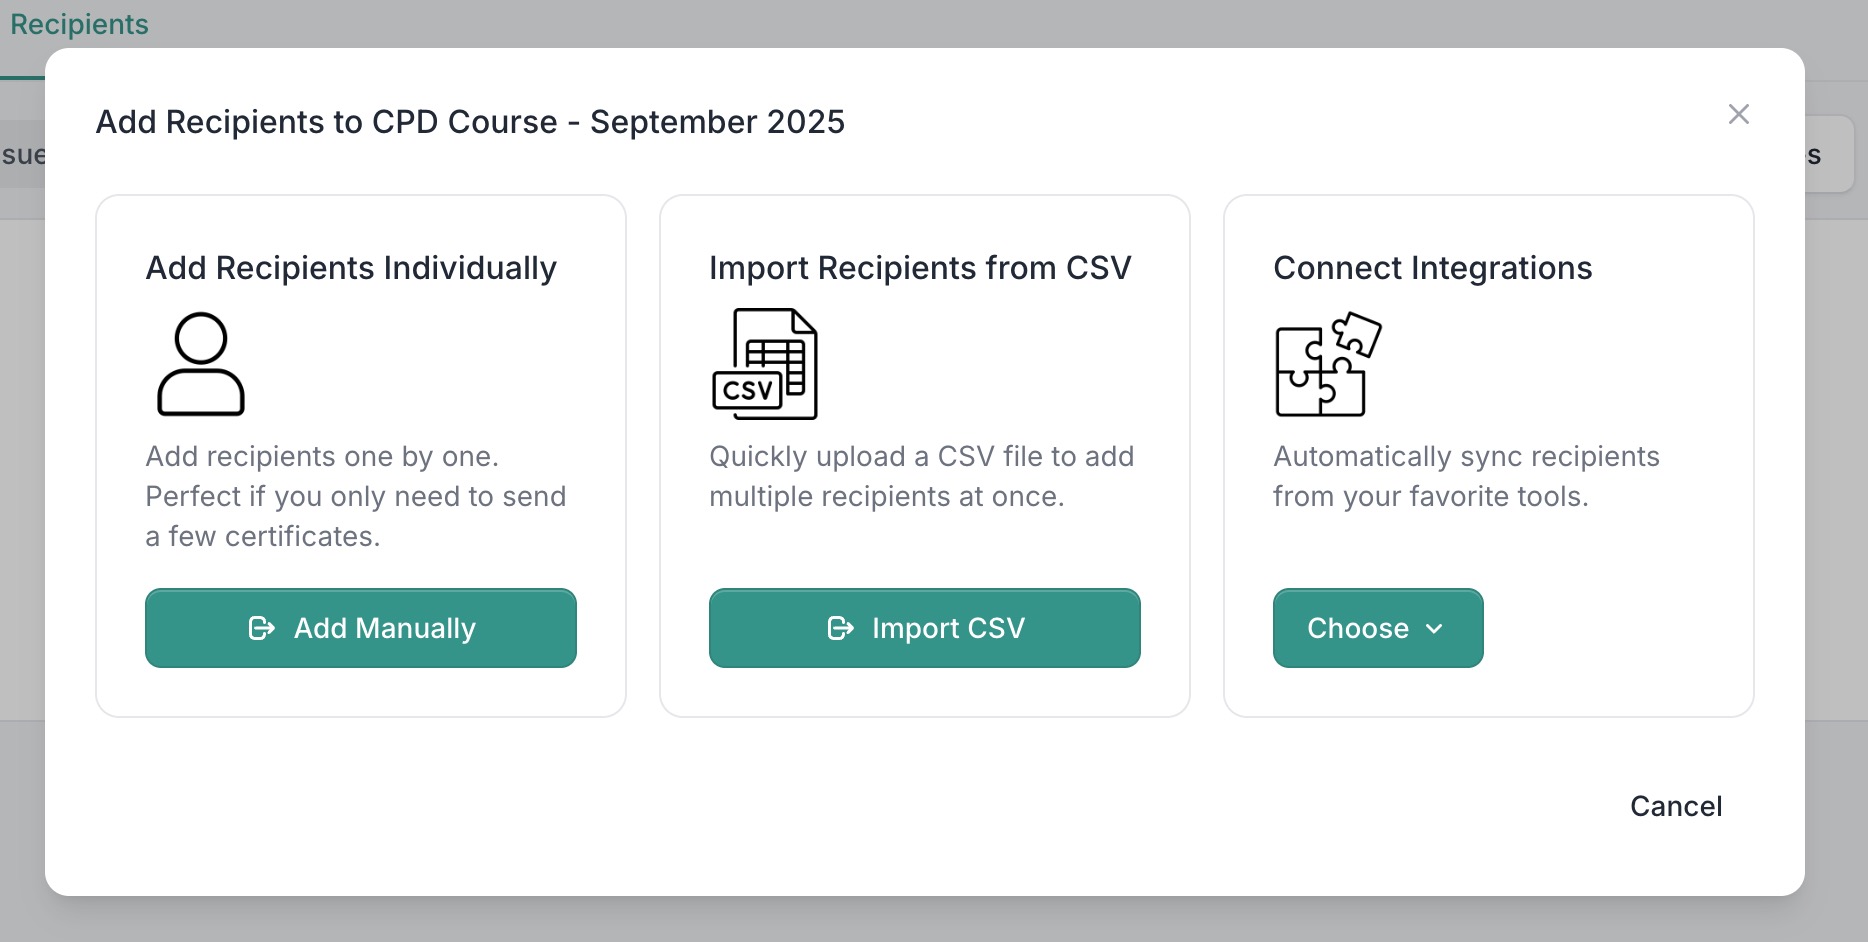
CertFusion pulls participant data from wherever you already have it:
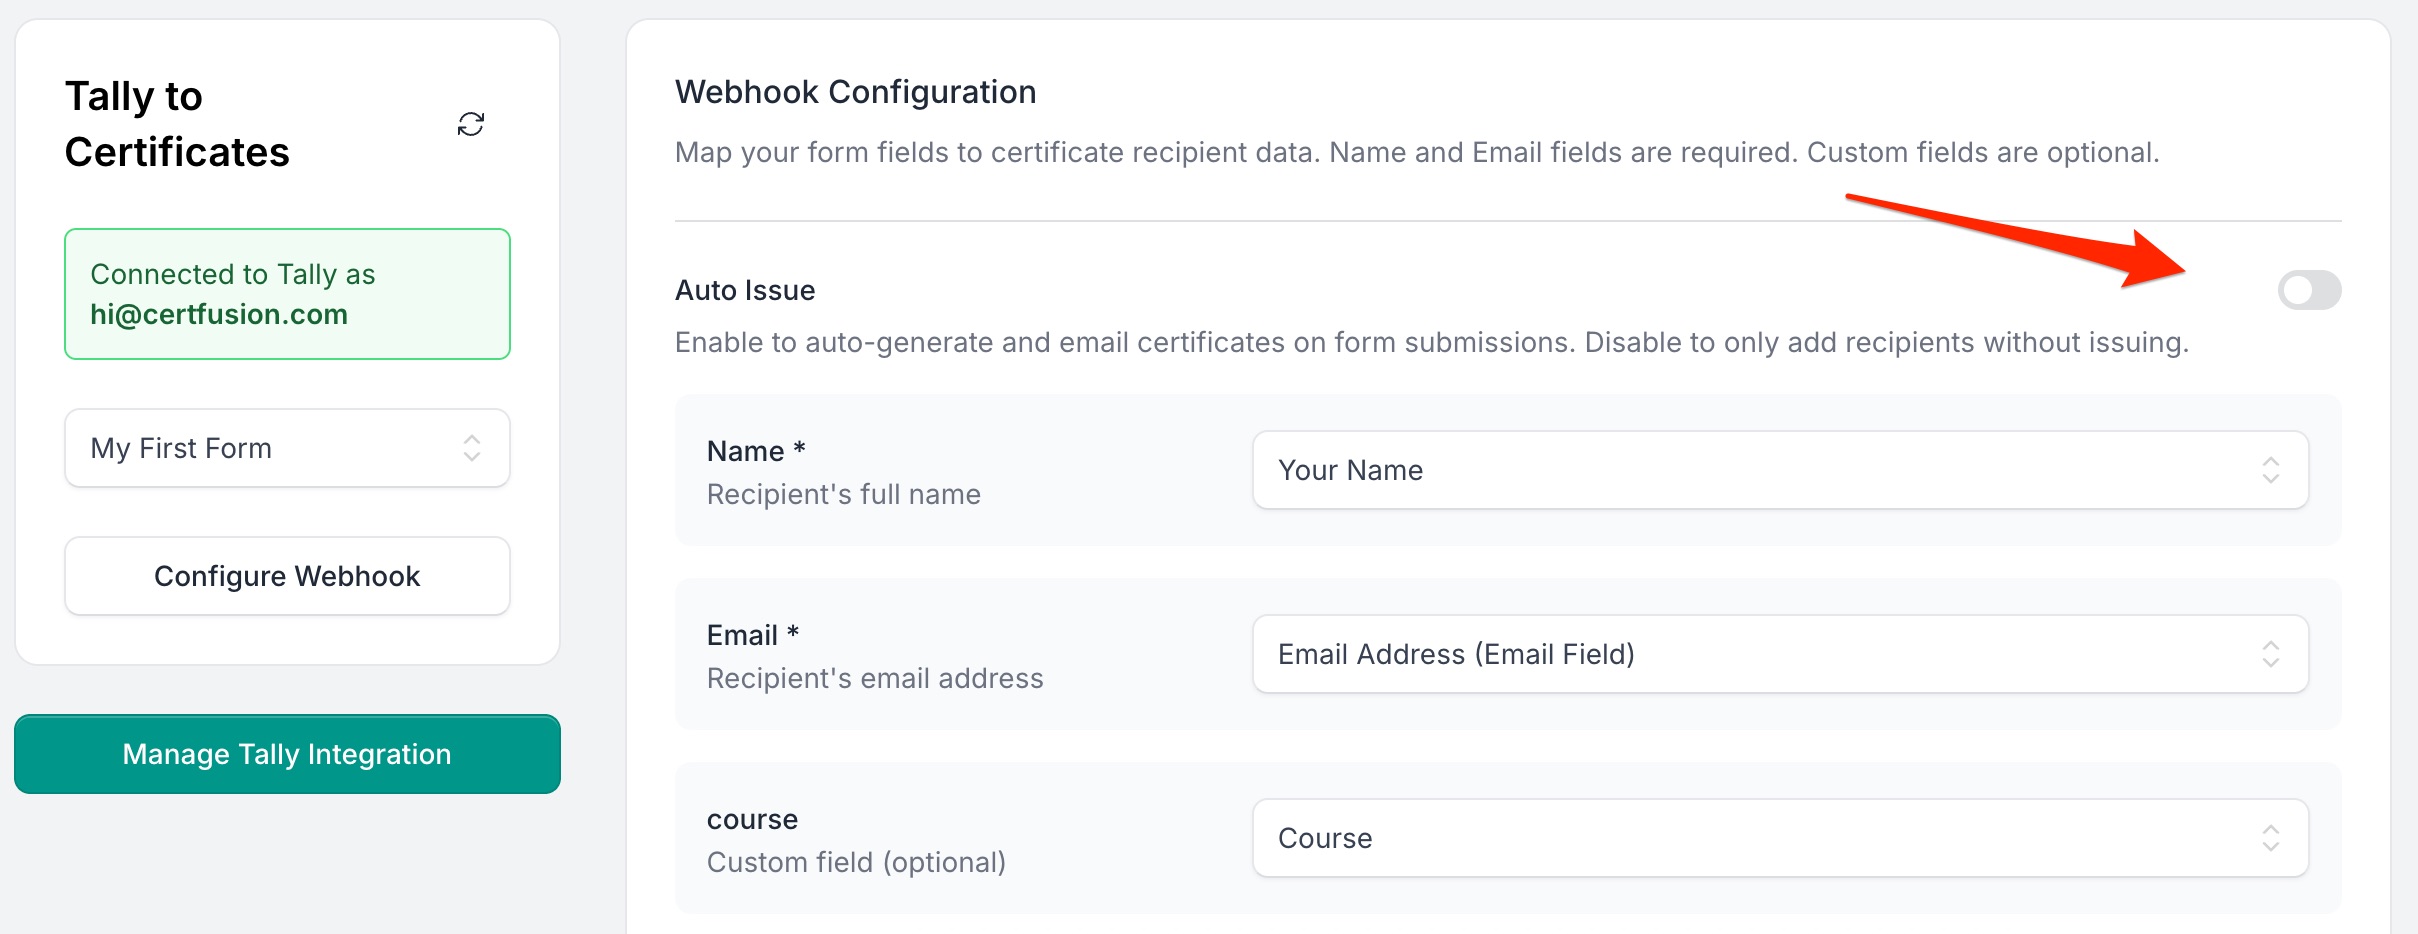
- Form integrations — Google Forms, Typeform, Tally (map form fields to template fields)
- Webinar integrations — Zoom, Google Meet, Webex attendance lists sync automatically
- CSV upload / manual entry — for offline events or platforms without integration
Step 3: Enable auto-issuance
For integrated sources (forms and webinars): open the recipients index for the integration, select the connected form or webinar session, and toggle Auto-Issue Certificates. From that point on, every new form submission or webinar attendee gets a personalised certificate automatically.
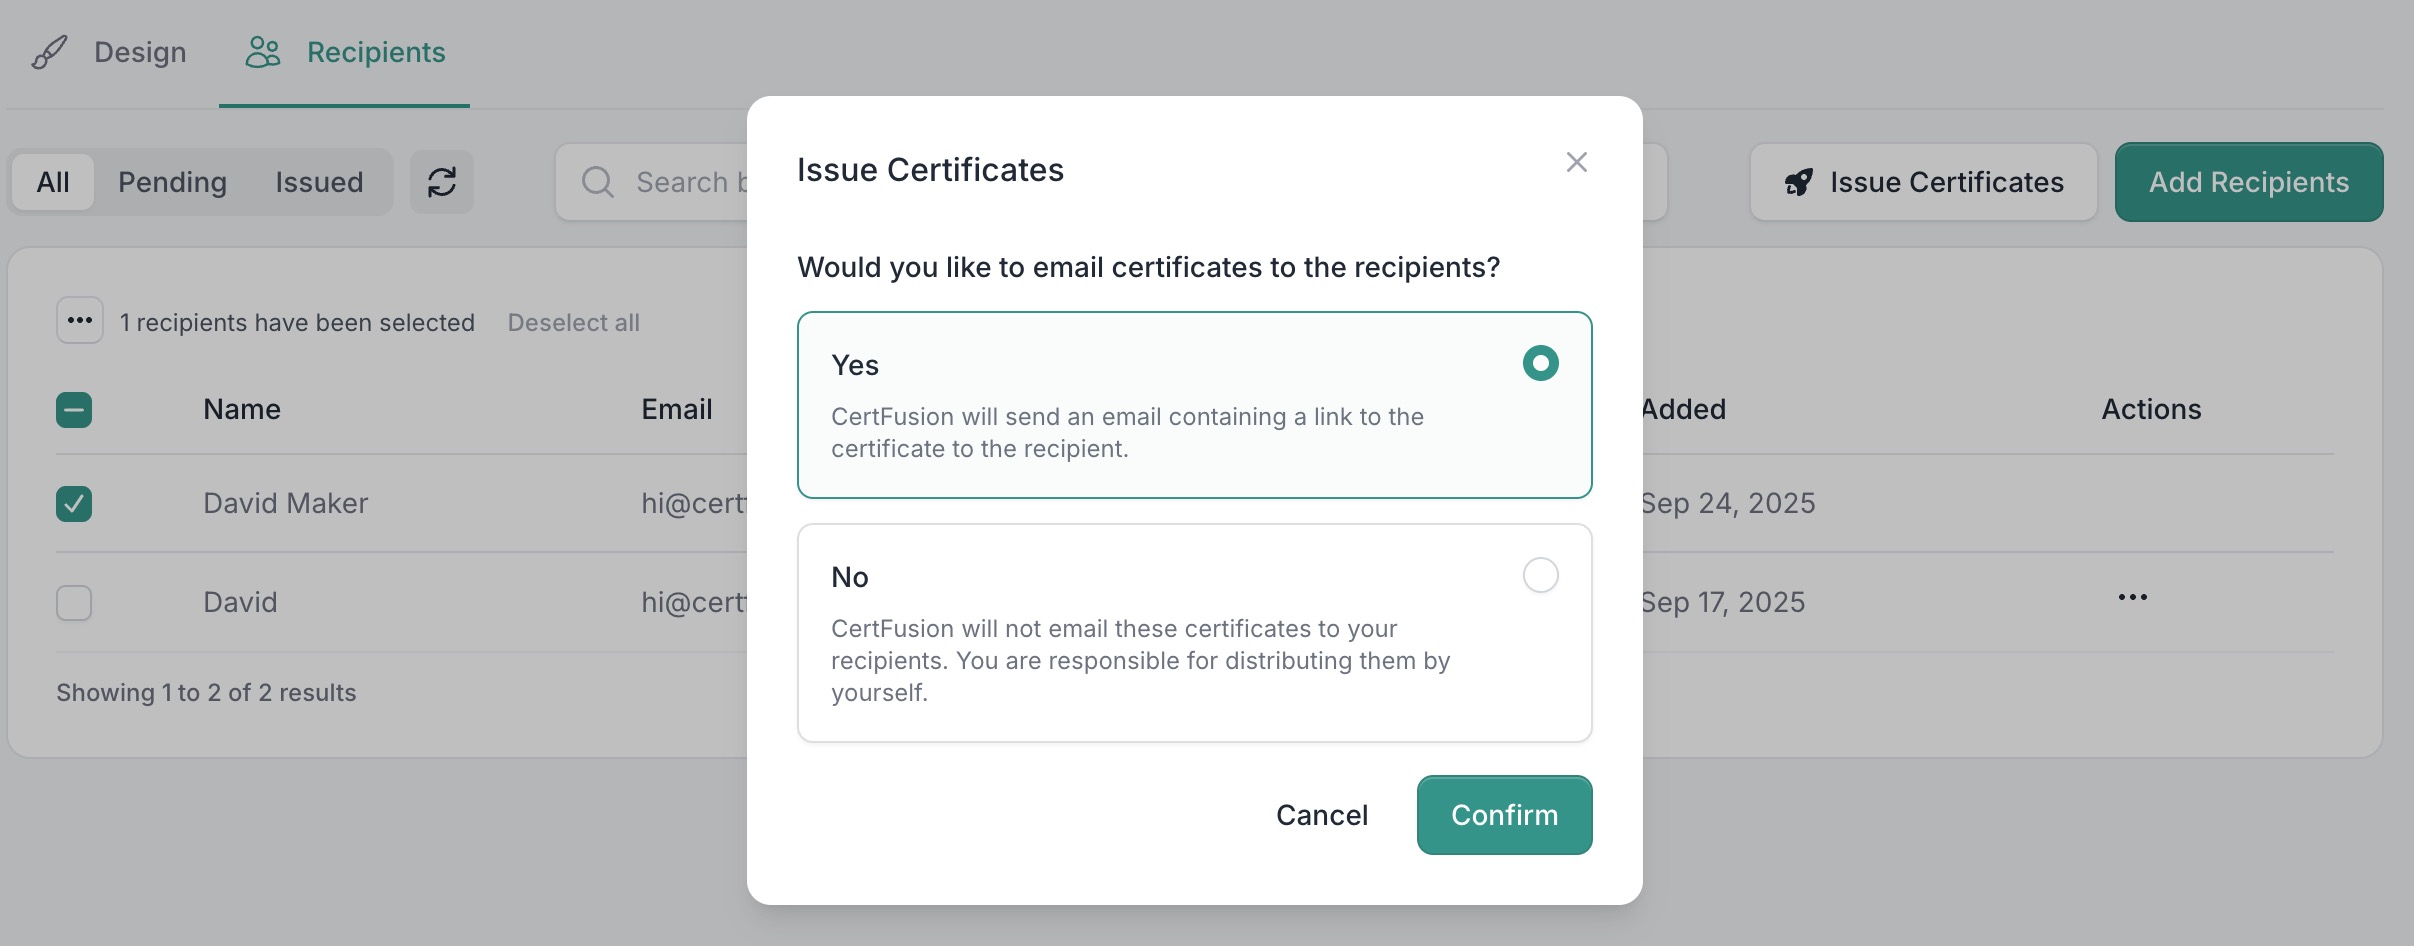
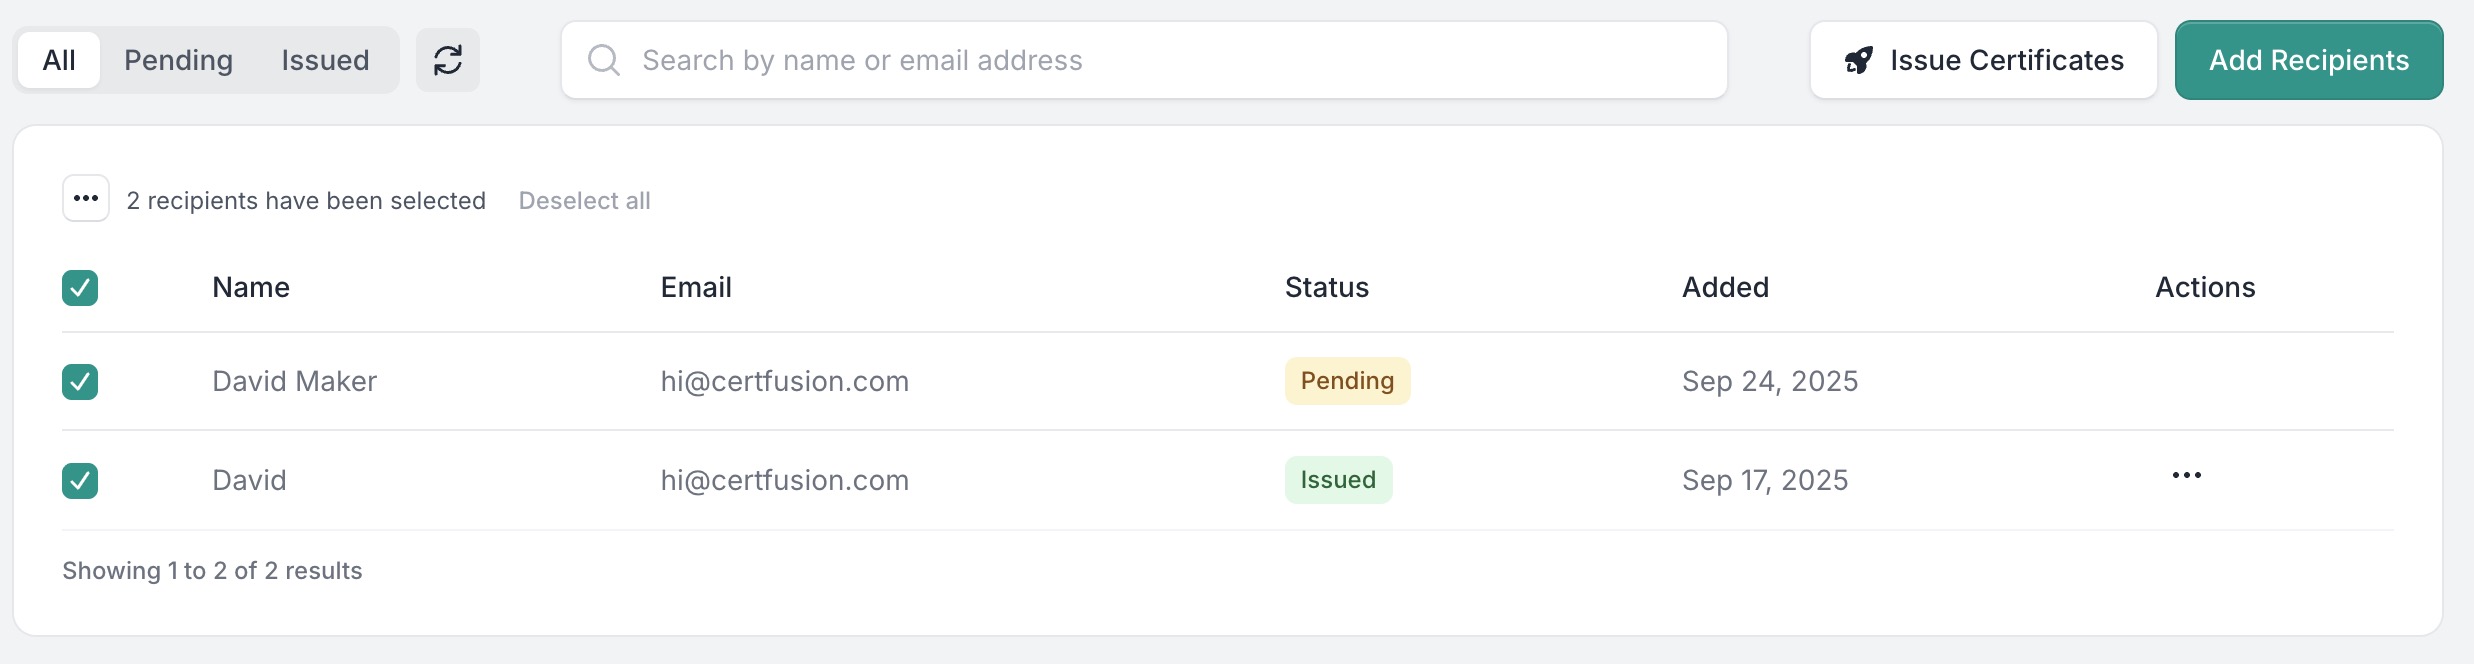
For CSV or manual entry: go to Recipients, add or upload participants, select them, and click Issue Certificates.
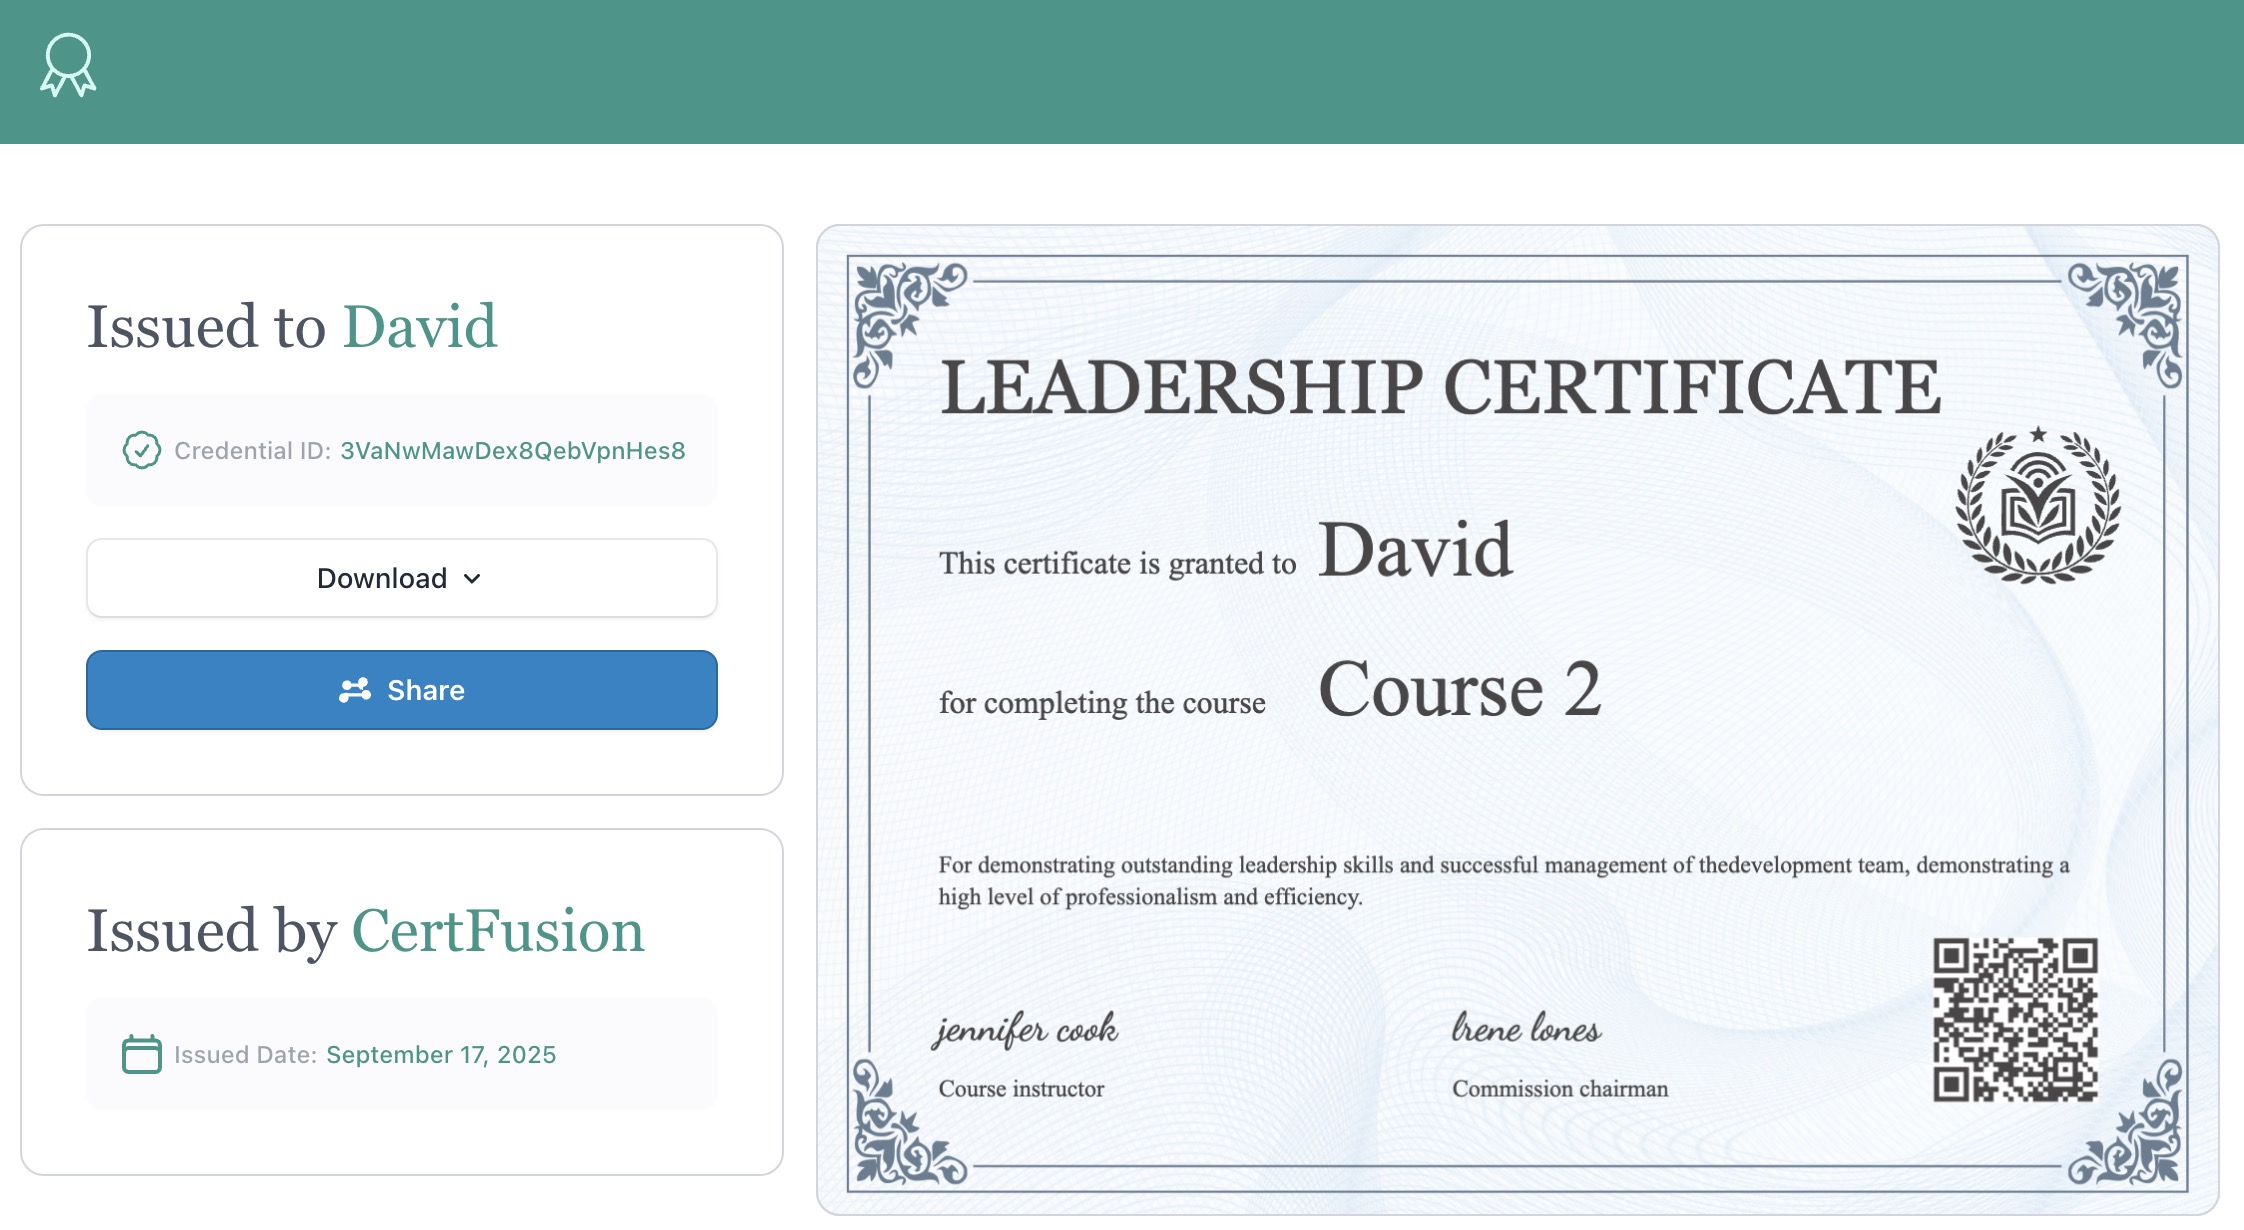
Step 4: Delivery and verification
Every recipient gets an email with a unique certificate URL. They can download the PDF, share to LinkedIn, or send auditors to the public verification page.
In the Recipients page, you can resend any certificate in one click, re-issue with corrected content, or delete to invalidate the verification URL immediately.
Honest on pricing: CertFusion is a paid tool. Plans are flat monthly rates (not per-certificate fees on most tiers) — for a 100/month workflow you're typically paying tens of dollars a month, not a per-cert variable cost. See pricing for specifics. For one-off certificates you don't want a subscription for, use our free online certificate generator instead.
Side-by-side comparison
The honest tradeoffs across the three methods:
| Method A — Apps Script | Method B — Word merge | Method C — CertFusion | |
|---|---|---|---|
| Time per 100 certs (after setup) | ~0 (automatic) | 30–60 min (manual send) | ~0 (automatic) |
| Setup time | 1–3 hrs | 30 min | 5 min |
| Verification URL | ❌ | ❌ | ✅ |
| LinkedIn add-to-profile | ❌ | ❌ | ✅ |
| Cost at 100 certs/mo | Free | Free | Flat plan fee — see pricing |
| Re-issue with correction | Manual (re-run script per recipient) | Manual | 1-click, preserves URL |
| Audit log (view + download timestamps) | ❌ | ❌ | ✅ |
| Works with no coding | ❌ | ✅ | ✅ |
| Scales to 1,000+/mo | Slow (Apps Script quotas) | ❌ | ✅ |
| Late additions | Re-run script | Re-run merge | Add + issue anytime |
For accredited programs specifically (CPD, CME, CEU) see our CPD / CME / CEU generator — same engine with credit-hour fields and compliance-ready templates.
Source-by-source how-tos
The same three methods apply to every data source. Here are the specific walkthroughs:
- Google Forms → auto-generate from Google Forms (deep dive)
- Tally → generate from Tally
- Typeform → generate from Typeform
- Excel → generate from Excel
- Google Sheets → generate from Google Sheets
- Zoom → Zoom integration
- Webex → Webex certificates guide
- CPD certs from Google Forms → automate CPD certs from Google Forms
- Tally quiz scores (trigger on pass/fail) → trigger certificates from Tally quiz scores
- Different names per certificate → auto-generate with different participant names
- Achievement certs from any sheet/form → auto-generate achievement certs from sheets, forms, Excel, CSV
- Sending to participants → send certificates to participants
Edge cases most automation guides skip
Multi-session events. A 4-session course where the certificate should only issue after all sessions are attended. Method A and B can't handle this without a custom attendance tracker. CertFusion supports a threshold (issue only when attendance ≥ N sessions / ≥ X minutes total).
Late registrations. Someone signs up 2 days after the webinar ended. Method A's script already ran; you'd need to trigger it manually. Method B requires re-running the merge. CertFusion: add the recipient manually to the same list and click Issue.
Partial attendance (minimum minutes). You only want to issue certificates to attendees who stayed ≥ 45 minutes. Zoom, Meet, and Webex all report per-attendee duration — CertFusion filters on it before issuing. Apps Script can, if you wire up the Zoom API yourself.
Re-issuing a certificate. A participant emails: "my name is misspelled". Method A: edit the Slides source + re-run the script per-recipient. Method B: edit the Excel row + re-merge that one cert. CertFusion: edit the recipient record, click re-issue, the verification URL stays the same.
Bulk invalidation. You discover a whole cohort shouldn't have been issued (wrong credit hours, certification body changed rules). Method A and B: no real workflow — the PDFs are already out in the wild. CertFusion: delete the recipients, verification URLs return not-found immediately. A self-serve bulk-revoke workflow with a preserved audit record is on the 2026 roadmap.
FAQ
Does this work with Microsoft Teams webinars?
Teams doesn't have a native CertFusion integration today. The workaround: export the Teams attendance report as CSV, upload to CertFusion, auto-issue from there. Takes about 2 minutes per webinar.
Can I auto-generate from Eventbrite?
Not natively. Use Zapier to pipe Eventbrite check-in data into CertFusion, or export the Eventbrite attendee list as CSV and upload.
Can I trigger via Zapier?
Yes. Connect any of Zapier's 5,000+ app triggers (new Eventbrite attendee, new Typeform response, new Airtable row, Stripe payment) and auto-issue a certificate.
Do auto-generated certificates carry CPD / CME credit?
CertFusion itself isn't an accreditor — but certificates carry your accreditor's name, logo, certificate ID, credit hours, and a verifiable URL. For accredited programs specifically, use our CPD / CME / CEU generator.
What's the cost at 1,000 certificates per month?
At 1,000/month you're on a flat monthly plan — not paying per certificate. Higher-tier plans are unlimited. See pricing.
Can I use this without any coding?
Yes. Methods B and C are both code-free. Only Method A requires pasting a script into the Apps Script editor.
Picking the right method
If you run one-off events under 50 people and don't need verification URLs, use Method B. If you're a solo educator with Google-native infrastructure and time to maintain a script, Method A is legitimately free. For anything recurring, anything at scale, or anything where an auditor might one day ask to verify a certificate, use Method C.
Table of Contents
Related Articles
Discover more insights and stories that might interest you